Longarm University
Your source for machine quilting education, tools and supplies
One Way to Fix Wonky Borders
Fix Wonky Borders Wonky Borders Thoughts Wonky Borders Comments
As a machine quilter, and especially if you quilt for others, you will have to deal with the "wonky border" issue.
What is a wonky border? It is a border that has been improperly pieced to the quilt top. Usually the border is wider / longer than the body of the quilt. The the border is eased to fit the body of the quilt, either on purpose or by accident.
This usually happens when the border is put right sides together to the body of the quilt, sewn into place, then trimmed. The border is NOT MEASURED, NOT cut to the size of the quilt body, and NOT pinned in place before sewing.
Sometimes, the piecer will put the border right sides together then sew it having the border next to the feed dogs on the (home) sewing machine. Sewing the border together this way will have the border fabric being "gathered" due to the action of the feed dogs and the weight of the quilt top.
For instructions on how to properly apply a border (pdf file) Click Here
No matter how you put your border on, if the border is not laying flat and smooth, there WILL be problems when quilting the quilt - no matter if you are using a longarm machine or a home sewing machine!
And, as a professional machine quilter, you will have this happen - a LOT!! You have to know when to fix the borders or "just deal with it!"
I am going to show you how I fixed the borders on a quilt that I am in the process of completing for a customer.
The quilt is very large 106 x 106 inches and well pieced. Two of the borders (we will call these the side borders) were applied fairly well (there is a slight issue with them, but that is quilt-able.) But, the top and bottom border had some issues.
Note: I have the backing fabric on my quilting machine and I am using it as a table to hold the quilt in place.
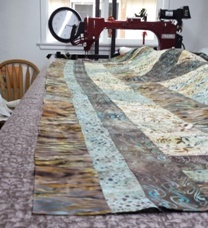
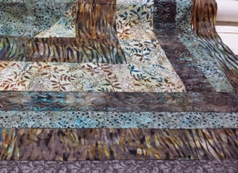
I started by draping the bottom edge of the quilt onto my backing fabric, smoothing it out and then looking at the bottom border.
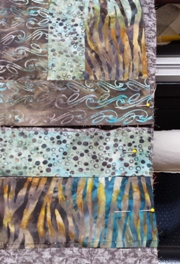
As you can see in the photo at the right, the bottom border is wavy and slightly curved. These are NOT good signs.
Click on any photo for a larger view and a slide show.
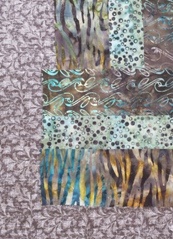
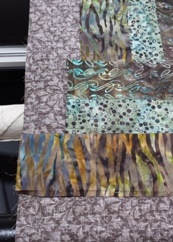
Then I looked at the right and left side bottom edges, and things got even scarier!
At this point I had some decisions to make. Do I leave the quilt "as is" and hope for the best when I quilted it? Or, do I take the border apart and re-apply it?
I could leave the quilt "as is" and "quilt it out", but, I knew from experience, this would not be easy and it may leave pleats and / or puckers in the border area.
I chose to take the two outer borders off, re-measure, then re-sew them to the quilt. Yes, this did take extra time, but ...., to me, it was well worth the effort. You will see why at the end of this page.
To view an article I wrote about Fixing Bad Borders Click Here
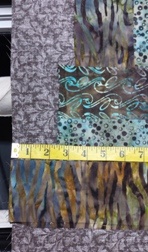
Once I made the decision to re-sew the border, I got busy. I took the stitching out of the bottom border. Then I laid the bottom border next to the quilt. This is what I saw.
There was a 2-1/2 inch difference in the length of the border piece! This 2-1/2 inches was "gathered" into the seam. You could not see any gathers, but the extra fullness was there. (Look at the first photo again.) When quilting, where would this extra fullness go? Into a pleat or a pucker!I then looked at the "second" border (the light teal dotted fabric) and saw that was wavy and slightly bowed.
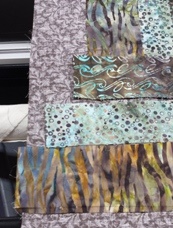
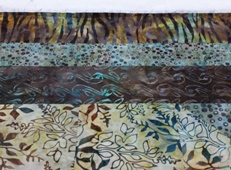
Yes, I took that border off the quilt also and here is what I saw.
To keep these pieces secure and not have them slip out of place, I pinned them to the backing fabric and had them even with the inner border.
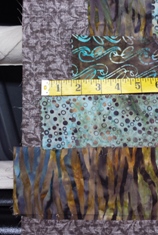
This border was 1-1/2 inches longer than the body of the quilt!
No, I did NOT take off the inner (brown swirly fabric) border. That one measured out all right after trimming the "tail" at the left edge.
I measured the body of the quilt, measured the (removed) borders to that measurement, trimmed them, divided them into quarters along the long edges, marked the quarters with pins, matched the pins, then sewed them, RST and pressed them.
Then I repeated the process and sewed the (re-sewn) borders to the body of the quilt and pressed.
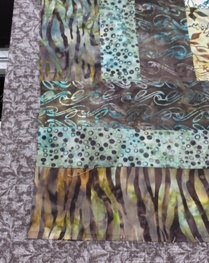
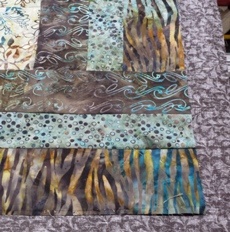
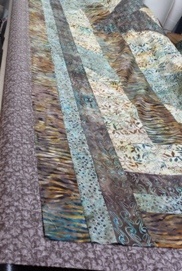
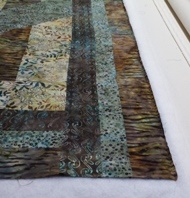
This is what the side edges look like now. Much, much better!!!
Here is what the bottom of the quilt now looks like spread out on the backing fabric.
Nice and smooth and flat! Which makes this quilter one happy camper!
Of course, when I finished the work on the bottom border of the quilt, I realized that I had to do the same for the TOP border. And I am glad I did - there was even MORE fabric in the top two borders then there was in the bottom border! I took the top borders apart, measured, trimmed and re-sewed them, the same way I did the bottom borders.
Now the quilt is on the machine and the top looks wonderful!
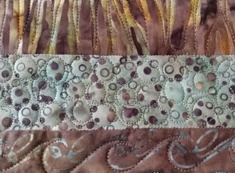
And here is a preview of what I am quilting in the borders.
It would have been a lot harder to quilt this with wonky borders!
By re-sewing the borders, did it add time to my quilting - absolutely! Was it worth it? to me, it was!
Do I do this all the time? No, not very often. In fact, this was the first time I had to do this in a very LONG time.
Only YOU can make the decision if you are going to do something like this.
All I can say is, that in my 20+ years of machine quilting for others, sometimes "you gotta do what you gotta do!" even if that means taking apart and re-sewing borders.
Is this extra work, YES! I have found that the time it takes to re-do the borders, will more than make up for the aggravation, frustration and crummy looking quilting that you will have without re-doing the borders.
To view an article I wrote about Fixing Bad Borders Click Here
If you would like to make any comments about this, please send an email to me at longarmu@aol.com I will post any comments - good or bad - that I receive.
Fix Wonky Borders Wonky Borders Thoughts Wonky Borders Comments
